Showing posts with label Do it yourself. Show all posts

Saturday, May 5, 2012

Raised Strawberry Bed On a Budget!


Today we built our raised strawberry bed!
The whole project cost under $20!!
Here is how we did it!
Picking an unused spot in front of the porch,
We laid down a double layer of Biodegradable landscape fabric.
Using wood Volfie has recycled  from a packing crate at work..
He simple nailed me together a box!
Once that was done ( and sorry I have no pictures because I was too busy spreading the compost with a rake) Volfie willed the bed with four wheel barrow loads of material from the compost heap. Mostly rotting straw mixed with goat and rabbit poop from last year.  We then put a thin layer of soil on top and planted the 14 Strawberry plants!
These came from my dear friend Barb who had extra plants in her strawberry bed. Even the nails used in this project came from Barbs Husband Bruce. He got a bucket full at a yard sale and was only to happy to share!  As a thanks you I took them some of my home started organic
celery plants and a dozen fresh eggs!
It is a blessing to have such wonderful friends to share life with!
The only cost to us was the landscape fabric and 3 bags of soil.
Hopefully in no time at all these plants will spread to fill the whole bed. Years worth of strawberries to enjoy! Thanks Barb&Bruce!
CHEERS!

Sunday, March 18, 2012

Spring Sap Run!

Time for Maple Syrup!!!

Yes Folks! Spring has Arrived on Our half acre Homestead! With it came the spring sap run!  We Don't get a lot of sap..enough to give us a litre or two of syrup.  We tapped 14 trees this year..and would have got a lot more sap..However..the temps rose too fast for us to run the sap for long.  But we'll get a taste! First though we drill a hole on the sunny side of the tree..
tap in a spigot and hang a bucket to collect the sap!
It takes forty gallons of sap to make one gallon of syrup...or there about.
Once we collected enough sap for a pot full..
We put it on to boil down.
Once it boils down to a rich dark colour..we will strain it through a clean pillow case into the stock pot for finishing in the house!
 
Our pot was not big enough to boil all the sap at once.  What we do when this happens.. we boil down the first pot to a nice dark amber colour.  We then pour it into a smaller pot and set aside. We refill the large pot with fresh sap and again..boil down to the same colour as the partially reduced sap that has been set aside.  Once the second batch has reached the same colour..we combine the two batches back into the large pot..and continue to reduce.
Many people make the mistake..of adding fresh sap to the already partially reduced syrup.  This dilutes the syrup and your sugar content and stability is compromised.  It is useable syrup..BUT must be refrigerated once bottled.
Syrup that has been properly boiled down..does NOT need to be refrigerated. It is shelf stable!
The next step is to get your bottles washed and rinsed thoroughly. My neighbors, when I was growing up used old whiskey bottles. But I save my store bought syrup bottles!

When the sap has boiled down to the right colour and flavour. We strain it through a clean pillow case..and bring it in the house for finishing on the stove.
Once boiling on the stove...you take a 1/4 cup of milk and one fresh egg..
and you beat them together. (I did not get a picture of this as my hands were full at the time.) Once your egg milk mixture is beaten up..pour it into the nearly finished boiling syrup. The egg and milk mixture COOKS in the boiling syrup. This is then skimmed off..this removes the finer particles that the straining process could NOT get.
  
This is how the scrambled egg looks when it has removed the fine silt from the syrup. 
Throw this out..or feed it to the pigs!
Once this is done it is now ready for the final straining through a fresh clean pillow case.

Now it is ready to be ladled into clean bottles and be capped!
The result is a lovely clear sweet product ready for your pancakes!

Nothing beats maple syrup you have made yourself!!
YUMMY!!

CHEERS!

Wednesday, January 25, 2012

Soil Blocks for Seed Starting!

Do It Yourself Soil Blocks!

Today is Robbie Burns Day and  and I am getting ready to start my early seeds for the Garden this year.  Recently I had heard about something called "Soil Blocks"  These are little compressed blocks of specialised potting mix that need no mesh or pots..in order for you to start your seeds!! Getting excited at the idea..I did a little research...these tools are NOT cheap!! ONE ..that is to make ONE 4 inch block maker..was on SALE for $26.95..ON SALE!!
So you know me folks...I made my OWN! It cost me under $8 and I will be able to use it over and over for YEARS..now folks..if you run a commercial green house..you MAY want to invest in the proper tools to do this on a multiple level..but for me..this will do PERFECTLY!
What this is, is a 2 inch long piece of 2 inch PVC pipe..
A 4 inch long, 1/2 inch blot bolt with a ring end.
Two corresponding nuts and washers and a larger washer for stability..
and a 1&1/2 inch pipe cap!!
On the pipe cap ( orange thing) there is a tiny pip the machine left when it cut off the cap..this is where I poked the hole for the bolt ( judging it to be centre)
I then slipped  on a washer..then slipped on the larger washer...spun on a nut to about an inch up the bolt...pushed the bolt in through the hole in the centre of the inside of the cap.
When the bolt was pushed out of the other side of the orange cap about 3/4 of an inch..I slip on the other washer..spun on the other bolt and tightened it all down.  The bolt and nut sticking out the end allows for a dent in the soil block where you can drop a seed.
As you can see..the "plunger" fits easily and snugly inside the 
the 2" PVC pipe.  You can also see the larger washer flush against the cap to give the more flimsy plastic stability.
For soil mix..I did some research. Not all potting soils are equal..having said that I made up a mixture of..

6 cups premium organic potting soil=
( compost,  peat-moss, vermiculite) 
Potting soil can be replaced by or combined with well rotted compost.
6 cups peat moss
6 cups vermiculite
Mix together and make sure there are no sticks or chunks..if you have a soil screen..go ahead and use that.
1 cup ground eggshell 
( these eggs shells were rinsed and toasted on a cookie sheet in a 200 DF oven for 15 minutes)
3/4 Cup Blood& Bone meal
6 Cups Water into which I mixed
one teaspoon generic plant food. 
Mix all together into a large container.


The mix should be moist and spongy when you take a handful and squeeze..but not wet enough to drip.
Have you tray ready that you are going to start your seeds in. 
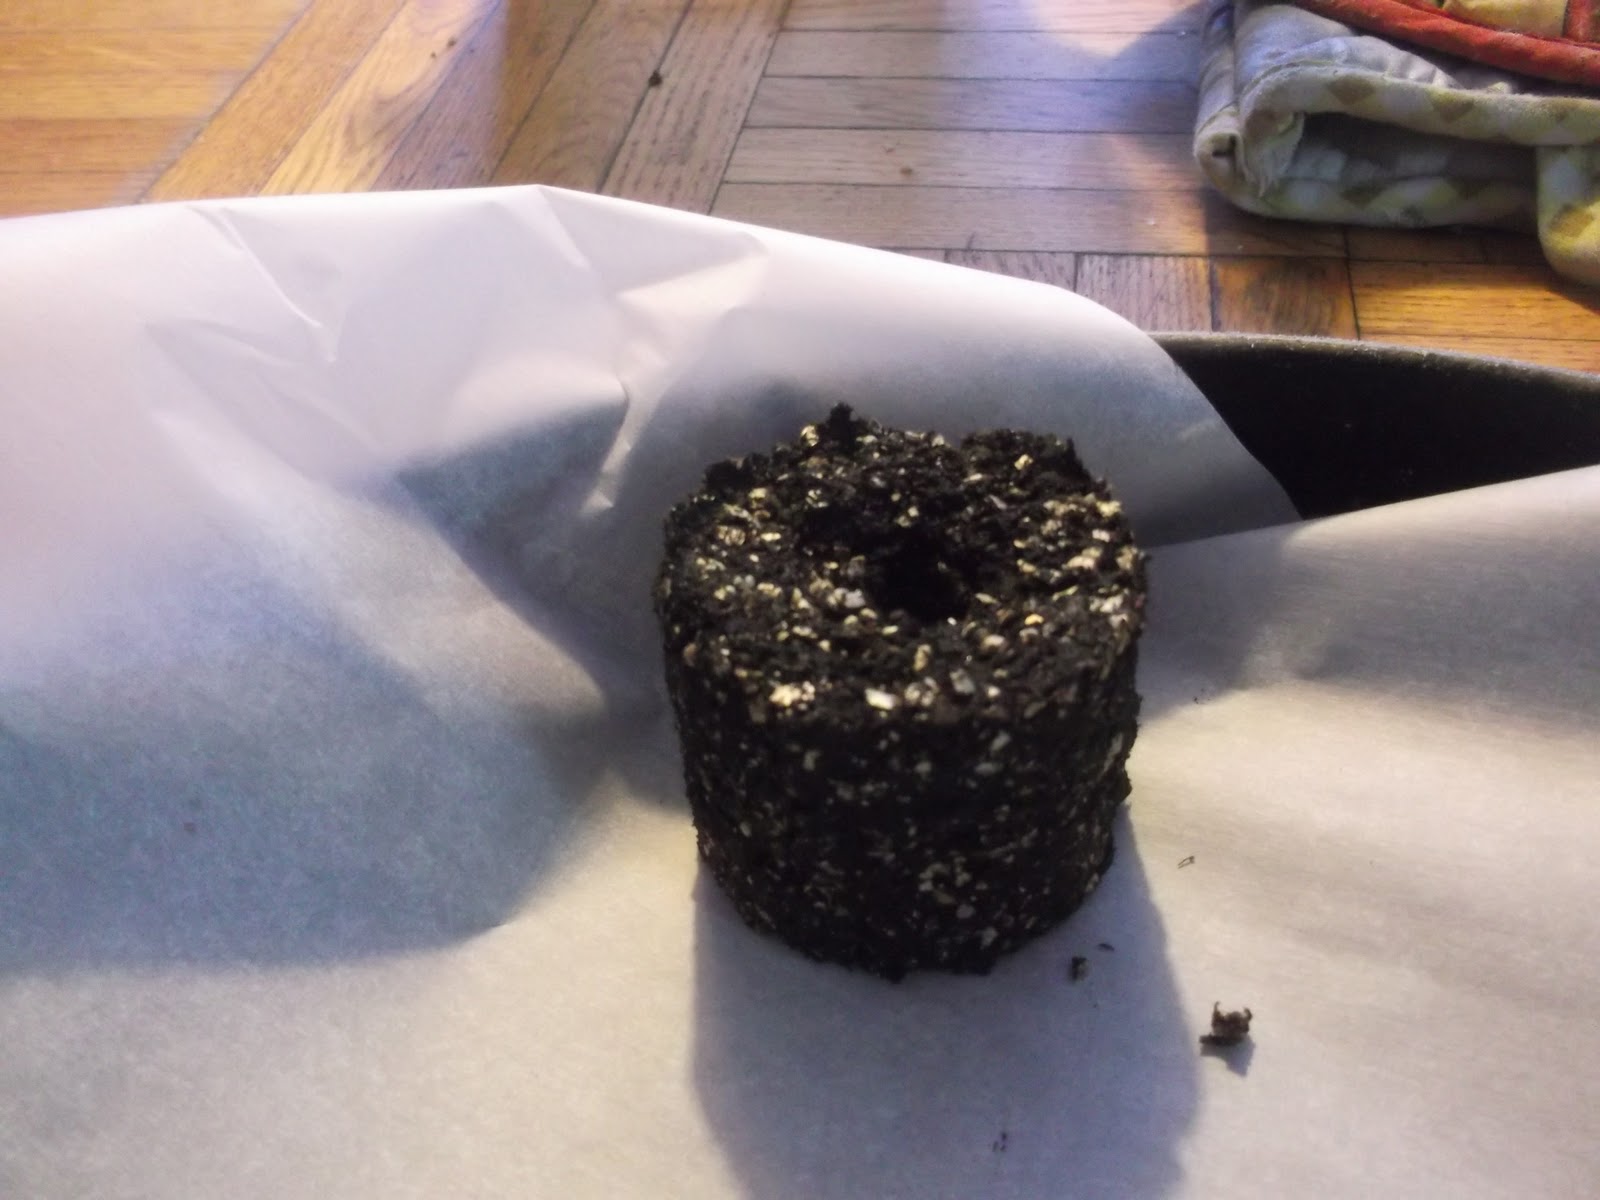
Then..Tightly fill your piece of PVC pipe with potting mix..

Set on a flat surface and push "plunger" firmly down into the pipe.
Don't be afraid to lean into it!
Then gently invert your block maker.
Gently twist your bolt back and forth while pushing out your block.
Gently set your seed Block into the tray..it is now ready for dropping a seed in the hole and covering with a sprinkle of potting soil or vermiculite!
Once you seeds are planted and covered with soil mix..cover the entire tray with a lid, plastic bag of even several thickness's of new paper until seeds sprout. until Sprouted..do NOT let soil block dry out! Once sprouted..water GENTLY when needed.
This is bloody butcher heirloom corn I used to test the blocks..this is the growth rate after only 5 days since planting!!
As you can see the sprouts are toothpick sized!
Soil Blocks! VERY COOL!


CHEERS!!

Wednesday, September 14, 2011

Home Made Butter!

Making Butter Was Never This Easy!

For those of you who have access to fresh cream..or even find whipping cream on sale..you can MAKE your own butter! I am lucky enough to have a milk goat who gives me one full litre of heavy cream once a week..I save my milk until I have 3 gallons and put it through my cream separator.  The milk I then make into cheese ( another blog next week) And the cream I make into butter. Goats milk is naturally homogenized..so it does not readily separate like cows milk does.  So for me the investment of a cream separator was worth it.
This one I bought from Ebay for $109..shipping included.

Here is the link!

Onto Butter Making!

For this you will need one litre of HEAVY whipping cream.

  Sometimes after holidays you can find it on sale. Check your prices..if the one litre carton of whipping cream is cheaper than butter..snap it up! One litre of whipping cream will give you one pound of butter and 12 ounces of butter milk. So if it is on sale..it is worth it!
Now..some people say it is best to whip it at room temps..but I have better luck ( maybe because it is goat cream) keeping things as cold as possible.
So I take two stainless steel bowels..put about 1.5 cups of water in one..and set the other inside..I put a light weigh inside the second bowl..and pop them in the freezer..they freeze together with a thin layer of ice between.


Pour In the whipping cream and whip it!!


Once it reaches the whipped cream stage..you continue to whip it until it begins to separate...Have PATIENCE..this can take up to 20 minutes.

Soon after this stage..you will begin to notice fluid in the bottom of the bowl..this is butter milk..mine is tan because it is goats milk...Cows butter is yellow with white butter milk..Goats butter is WHITE with tan butter milk.


At this point your beater will begin to labour..so be careful not to burn out the motor! If you have a kitchen aide that would work MUCH better!
Once you have reached total separation..strain out the butter milk and save for pancakes or biscuits..or cheese milk starter!


Now you need to wash and salt you butter..I salt mine because I do not pasteurize my milk..so I don't want the butter to go rancid.
After you have strained the butter milk off..pour some ice cold water over you butter and begin to work it through..you CAN use your better..but it is hard on the motor. Pour off the cloudy water..and add more fresh ice water..continue in this pattern until the water runs clear.


Once you water runs clear..add some salt to taste..I use about a teaspoon..and press it through the butter with a spatula ( or beater..but I wouldn't advise it at this point) And continue to pour off any water that may get worked from the butter as your work the salt in.

And here it is..one full pound of goats cream butter!

  Isn't it PRETTY?
So if you don't have a milk Goat or Cow...keep your eyes on those whipping cream sales!

CHEERS!!


Friday, September 2, 2011

Update!!

Busy Busy Summer!

Hey Everyone!
Hope you have all had a wonderful summer! Mine has been busy to the point of exhaustion at times..but It has been wonderful none the less!
Here are some updates!

TOMATO HANGERS

I was not overly impressed with the results of these..Having said THAT..A lot of the problems could very well have stemmed from my lack of proper filling. Having had surgery and being weak..I did not fill them as much as I should have..and I also forgot one very KEY ingredient to the soil/mulch mixture..CALCIUM...Tomatoes LOVE calcium. SO..I will give them another shot next year..and these are the changes I will make.
A) I will rinse and save my egg shells to mix in with the soil/compost mix.
B) I will fill them COMPLETELY with the mixture ( as in not half full)
C) I will not over water..because of the lack of sufficient soil..I had to water more frequently thus causing mold issues.

CABBAGE TENT

On the Whole I was VERY pleased with the results! The tent was too small to allow me to leave it on for the entire grow period..However..it DID allow the cabbages to get to a decent enough head size before they goat attacked but cabbage worms.  So although there was SOME damage..There was not enough to deter me from planting them again next year. Here is a video on the results and what I did with the harvest.

BEANS!


On the whole my beans did REALLY well and I would say I got over a bushel from the 3 rows...I have left some larger ones on the plants and pulled them up and hung them to dry..thus saving my seed for next year. 

BEES!

Our Hives did well..although we ran into a few problems with one hive.
But so far harvested about 30 pounds of honey..with another super to be harvested yet.  We are VERY pleased!


MILK!
Bizzy..Our Nanny Goat that gave us Twin Daughter Back in May..is giving us between 3 and 3.5 litres of milk a day! And I have bought a hand crank cream separator! So as I result I have been making butter and cheese! Still working it all out..but it is an experience I am having a lot of fun with!
All in All It has been an amazing summer..and it is far from over!
We still have things to harvest..and chickens to get into the freezer.
But I would say it is a lifestyle that is fast becoming second nature to us,
and will continue as long as we are able.  There is something WONDERFUL..about sitting down to a meal and knowing that everything on your plate..including the glass of milk beside  it..came from your own land and hard work! I know not everyone is lucky enough to have a little half acre of heaven...But self sufficiency can be had by even city and apartment dwellers. Find the deals at the farmers market..Shop in Bulk..teach yourself to can.  I promise you won't be sorry!
Here is my channel on YouTube..I have spent a lot of time putting together many how to videos for you..and basically sharing our journey up to this point. Thanks all for your patience..I will continue to be busy for a month or so yet...but will do my best to be more attentive to my blog when things slow down!
Blessings!

Saturday, June 25, 2011

Garlic, GARLIC, GAAARLIC!!!

Gotta Love Garlic!

Normally I buy fresh garlic...But When Shopping yesterday I came across a deal I could NOT resist!  THREE pounds of PEELED garlic cloves for $6.49!!
Now..I KNOW..that you can buy fresh unpeeled garlic for about $1.29 a pound..BUT...This was PEELED..saving me hours of time!
So First I wanted to dehydrate some and make my own Garlic powder...So this is what I did!

I got out my dehydrator..and my handy dandy Dollar store crank grater...I put in the slicing blade and a handful of clovers and I started to crank!!


This thing works like Magic! In less than 10 minutes I had sliced over a POUND of Garlic!  All four dehydrator trays to be precise!
I closed it up and turned it on at about 100-115 Degree Fahrenheit...And went back to work!

This time I put the larger grating blade in and grated up about 3/4 of a pound of the cloves...I put them in a jelly jar..added 1 TBS white vinegar, 1 TBS olive oil and 1/4tsp sea salt...snapped on the lid..shook it up and put the jar of MINCED fresh garlic in the fridge.
When the garlic chips were dry ( 12- 18 hours) I started filling my spice grinder!


Here is what I have so far...


And I STILL have another four trays in the dehydrator!!
I have not decided if I am going to grind it, or leave it in chips..either way..I have enough for another bottle of garlic powder..Now this stuff is MUCH stronger that store bought garlic powder..so it will go farther..but either way..I figure I have about $ 9-$12 worth of premium garlic products!! WOOT!

CHEERS!!!